Welcome to the blog Hitech Tips

A blog about web and IT. Sharing things I use at work.

Template backup

Posted by j. manuel cordeiro Saturday, July 23, 2011 0 comments

This post in English


Antes de se modificar os aspectos da template do blog, é crítico fazer uma cópia de segurança da template. Se algo correr mal, pode-se depois voltar a trás com esta com esta cópia.


Como fazer cópia de segurança da template (ou modelo, em português)

  1. Entrar no blog e clicar em Design
    image
     
  2. Clicar em Editar HTML
    image
     
  3. Clicar em Transferir modelo completo
    image
      
  4. Guardar o ficheiro algures no disco. É um ficheiro do tipo XML, que é basicamente texto com a template do blog. Pode ser aberto com qualquer editor de texto simples (exemplo: Notepad do Windows; recomendo o uso do Notepad++).

Está feito.


Como usar a cópia de segurança da template para desfazer um erro decorrente de se ter alterado a template do blog


  1. Entrar no blog e clicar em Design
    image
  2. Clicar em Editar HTML
    image
  3. Escolher o ficheiro guardado no ponto anterior (clicar em Browse/Procurar, dependendo da língua usada) e clicar em Carregar.
    image
     
  4. Podem aparecer mensagens como a que se segue:
    image
    Esta mensagem significa que o ficheiro que se está a carregar contém menos coisas do que a template em uso. Se a modificação que se fez na template foi acrescentar coisas, é normal que a versão anterior tenha menos coisas. Por isso, clicar em Eliminar Widgets. Caso contrário, ter a certeza de que o ficheiro que se está a carregar corresponde de facto à última versão da template que esteve online.
    Dica: em caso de dúvida, fazer a 1ª etapa (backup da template) para se guardar o que haja a guardar antes de carregar a template.
  5. Depois de carregado o ficheiro, as alterações entram em funções imediatamente.
    image

Nota: se se pretender ver as alterações da template antes de a carregar como se acabou de descrever, pode-se copiar o conteúdo da template e colá-lo na caixa seguinte (depois de se ter apagado o respectivo conteúdo):

image 

De seguida, basta clicar em Pré-visualizar.

Windows Live Writer: formatar imagens

Posted by j. manuel cordeiro Friday, November 19, 2010 0 comments

Este tutorial explica como formatar imagens nos posts escritos com o Windows Live Writer.

Nível de dificuldade: baixo


Comecei por detestar a abordagem da suite Live, especialmente do Live Messager, que tornava publica informação minha sem meu consentimento (sim, pode-se ir à configuração e mudar mas o default é abusivo). Mas o Live Writer é uma killer app e já escrevi alguns posts sobre a forma de o usar.

Já abordei a forma como se instala este software e alguns aspectos da sua utilização (sobre captura de imagens e sobre o ping para o Twingly e para o Wordpress). Agora debruço-me sobre a inclusão de fotos nos posts. Este aspecto é um pouco manhoso mas depois de umas configurações, é impec.

As imagens seguintes reflectem as configurações que uso regularmente para as imagens. Experimente defini-las (para isso, inserir uma imagem e depois clicar nela para activar os painéis de opções) e depois clicar no guardar como predefinições. Desta forma, a próxima imagem que inserir estará com as definições que deseja.


NOTA: estas imagens são copiadas do Windows Live Writer XP. A última versão (Windows Live Writer 2011) tem um aspecto diferente mas os conceitos são os mesmos. Basta um pouco de esforço para encontrar as mesmas coisas.


Imagem 1

- inline para o uso habitual no blog (por vezes coloco Esquerda para o texto contornar a image)

- sem margens (fica o default do blog)

- limites (border): gosto da imagem com uma linha à volta. o papel fotográfico tb é interessante especialmente quando o centro do post é a fotografia

- hiperligação: na maior parte dos casos não quero nenhuma ligação. mas pode ter interesse ter a ligação para um URL (exemplo: recorte de uma notícia e link para a origem) ou então para a imagem de origem (neste caso ver a imagem 6)


Imagem 2

- tamanho médio (clicar no esquadro para definir o que é tamanho médio (ver a imagem 3)

- incluir um texto descritivo da imagem (ajuda o google na pesquisa de imagens)


 Imagem 3
- definir os valores dos tamanhos pré-definidos.
- no Aventar, uma imagem não deve passar muito dos 550 pixéis de largura (se não passar por cima da barra lateral ou fica cortada).

Imagem 4
nada de especial a referir mas ver a lista de efeitos possíveis

Imagem 5
lista de possibilidades de hiperligações das imagens

Imagem 6
na maior parte dos casos, quero que, quando a imagem liga para a imagem de origem, seja apresentada a imagem no seu tamanho original. fazer esta pré-definição aqui.

Imagem 7
Depois de feitas as pré-definições, clicar no guardar como predefinições e assim a próxima imagem inserida terá de imediato estas características


UM TRUQUE
Por vezes quero inserir uma série de imagens iguais mas diferentes destas predefinições. Exemplo: incluir 10 imagens com tamanho 100x100 e a apontar para a imagem de origem mas redimensionada para um máximo de 800x600. Para poupar tempo, insiro a primeira imagem, formato-a assim e, tendo-a seleccionada clico no guardar como predefinições. Desta forma as próximas 9 imagens que inserir terão as mesmas características. Depois volto a colocar as predefinições genéricas a usar nas restantes postagens.


Fica aqui um link com informação detalhada sobre como instalar o Windows Live Writer. 

http://hitech-tips.blogspot.com/2010/02/bloggers-prestem-atencao-ao-windows.html

E aqui mostro como fazer capturas de ecrãs:

http://hitech-tips.blogspot.com/2010/02/faca-posts-de-forma-rapida-e-eficaz.html

Sobre este programa de captura de ecrãs (há muitos), é de realçar um aspecto muito prático e que é o facto do software poder gravar automaticamente em disco a imagem capturada. É especialmente se se estiverem a fazer várias capturas. Também permite copiar automaticamente para o clipboard a imagem capturada (muito útil também). No anterior link explico como se faz isso.


Boas postagens :)


Links para download do Windows Live Writer:

How to setup the AddThis share buttons

Posted by Mr.Editor Thursday, November 4, 2010 0 comments

This tutorial shows how to add the "Share This" buttons to your blogger blog. At the end, you will have something like this:

image

tip level: intermediate

1. First of all, backup your template. See how: Template actions: download, backup, edit and restore. If anything goes wrong, this is your chance to go back.


2. Now, setup an AddThis account:

  • Go to http://www.addthis.com
  • Choose the sharing style:
    image
    Personally, I prefer the first option, but without the "Share" button ( because it makes a popup window to appear). Bellow the instructions will show how to have this:
    image
  • Choose to have sharing analytics:
    image
  • Click to have the button code:
    image 
  • Now you will need to register. Bellow I show my registration. Note at the username, it'll be used bellow.
    image
  • Now, copy the code:
    image
    and paste it in some text editor (notepad it's ok).  We will return to this code later.

3. Having this done, it's time to modify your template.

  • Make a copy of your template you downloaded in step one and let's modify it. You can use any text editor (such as notepad).
  • Search for the text  </head> and open a new line above it.
  • In order to choose the language in use, paste the following text:
    <script type='text/javascript'>
        var addthis_config = {
            ui_language: &quot;pt&quot;
        };
    </script>

  • Where it's written pt you can place the letters for your language. After this change, it should look like this:
    image

  • Now search in your template for this text:
    <data:post.body/>
    If you can't find it, search for
    data:post.body
    and then make sure it has a similar pattern to <data:post.body/>
  • Open a blank line bellow this text and paste there the following code:
  • <script type='text/javascript'>   
    var addthis_share = {
        url: &#39;data:post.url&#39;,
        title: &#39;data:post.title&#39;,
        templates: {
            twitter: &#39;RT @fliscorno {{title}} {{url}}&#39;
        }
    };
    </script>

    <div class='sharepost'>
        <div class='addthis_toolbox addthis_default_style'>   
            <span class='addthis_separator'>Partilhar: </span>
            <a class='addthis_button_facebook' expr:addthis:title='data:post.title' expr:addthis:url='data:post.url'/>
            <a class='addthis_button_twitter' expr:addthis:title='data:post.title' expr:addthis:url='data:post.url'/>
            <a class='addthis_button_myspace' expr:addthis:title='data:post.title' expr:addthis:url='data:post.url'/>
            <a class='addthis_button_blogger' expr:addthis:title='data:post.title' expr:addthis:url='data:post.url'/>
            <a class='addthis_button_wordpress' expr:addthis:title='data:post.title' expr:addthis:url='data:post.url'/>   
            <a class='addthis_button_google' expr:addthis:title='data:post.title' expr:addthis:url='data:post.url'/>
            <a class='addthis_button_friendfeed' expr:addthis:title='data:post.title' expr:addthis:url='data:post.url'/>
            <a class='addthis_button_delicious' expr:addthis:title='data:post.title' expr:addthis:url='data:post.url'/>
            <a class='addthis_button_email' expr:addthis:title='data:post.title' expr:addthis:url='data:post.url'/>
            <a class='addthis_button_favorites' expr:addthis:title='data:post.title' expr:addthis:url='data:post.url'/>
            <a class='addthis_button_print' expr:addthis:title='data:post.title' expr:addthis:url='data:post.url'/>   
        </div>
    </div>                                                   
    <script type='text/javascript'>var addthis_config = {'data_track_clickback':true};</script>
    <script type='text/javascript' src =
    'http://s7.addthis.com/js/250/addthis_widget.js#username=hitechtips'> </script>

    <br/>


    IMPORTANT: replace the red text above by your own usernames:
    - replace fliscorno with your twitter username
    - replace hitechtips with the username you created at step 2. You can copy if from the text you pasted at the end of step 2.

    Replace the text Partilhar with whatever you want to say (eg. Share)

    At the end of this step, it should look as the following picture:
    image
    (click to enlarge)

    Another tip about where to put this last piece of code: it must be in between <data:post.body/> and </b:includable> (see the picture).

  • Save the template and upload it to your blog (see the link at step 1).
  • Preview the blog and it's done. If the blog stop working, then restore the older template you have backed up at step 1.


Further steps:

  • The AddThis button can have Facebook and Twitter counts. See the AddThis help for instructions. See also here.

Help, this doesn't work!

  • Be sure that all the opening quotes (') have a corresponding closing quote
  • Make sure the text you have paste is OK
  • Make sure you pasted the text at the right places


Did you enjoy this tutorial? Make short post on your blog with a link to here :) I will appreciate it.

The search as you type functionality in FF and Chrome

Posted by Mr.Editor Wednesday, June 23, 2010 0 comments

image

Firefox has functionality I just love: the search as you type functionality. It's not ON by default and to make FireFox exhibit this behaviour, check the Tools -> Options -> Advanced -> General -> "Search for text when I start typing" checkbox. When active, to find something in a page, one just start typing the text to be found. It's not necessary to press CTRL+F or F3. To find the next match, just press CTRL+G or F3.

Why is this great? Because it improves the browsing usability. Imagine you have goggled something and then open a page. To see where the searched text appears with the search as you type functionality, just start typing the text you have goggled. See, easy and fast. No need for extra keystrokes.

However, this functionality isn't available in Chrome which have keep me away form a more regular use. There is however an extension that just do that: chrome-type-ahead. It looks like that the Chrome developers don't like this search as you type feature but, IMHO, because of stubbornness than anything else. Anyway, the Chrome extension is there, not as perfect as it could be if part of the Chrome core, but still quite ok. Give it a try if you are in the mood.

http://code.google.com/p/chrome-type-ahead

CPU benchmarks and the HP TouchSmart tm2 tablet PC

Posted by Mr.Editor Saturday, May 29, 2010 0 comments

CPU benchmarksSo you are about to buy a new computer and suddenly you discover that the number of choices are endless. Distant is the time when choosing a computer was basically choosing among 3 or 4 microprocessors, a graphics card, the amount of RAM and a large hard disk. Even if these items are not so difficult to choose even now a days, you will probably get stuck when it comes to the heart of the computer, the microprocessor. Models and models, speeds, brands, technologies and so on, and so on. The microprocessor commercial approach has made impossible to choose without a reference service. That's here where a service such as the cpubenchmark.net comes to action. Search for a specific CPU model and obtain a position in the performance rank (direct link to the search form).


HP TouchSmart tm2 tablet PC HP TouchSmart tm2 tablet PCIt was this way that I came to know that the interesting tablet computer concept from HP, the HP TouchSmart tm2-1090eg Notebook-PC, would be quite disappointing when running more demanding software. With a CPU Intel SU7300 @ 1.30GHz, it ranks at the lower level of the performance  chart. This make it not suitable for photography field work, what would be my main task for it, specially because of its touch screen and foldable screen.


However, who is looking for an acceptable computer that is also a tablet can find an interesting solution on this  HP EliteBook 2740p Tablet PC. But at what price :-S


Note: Intel has a compare functionality for its processors here: http://ark.intel.com/Default.aspx. And AMD has something similar here: http://products.amd.com

Facebook Fan Pages vs. Networked Blogs

Posted by Mr.Editor Wednesday, May 26, 2010 0 comments

Post image for Facebook Fan Pages vs. Networked Blogs

Facebook Fan Pages vs. Networked Blogs

Love it or hate it, Facebook is here to stay. Despite challenges around user privacy and an ever-changing interface, Facebook is rapidly becoming THE gateway to content for many users. As a blogger, Facebook can be a great tool to promote and share your content to potential readers. But the real question is…what’s the best way to do that? ()

Template actions: download, backup, edit and restore

Posted by Mr.Editor Thursday, May 13, 2010 0 comments

This tutorial describes how to perform a backup of your template, how to edit your template and how to restore your template.

tip level: beginner


Some times people find problems editing their template and then I figure out that the root for the problem is because they didn't select the "Expand Widget Templates" check box. So, if you are using the code directly from this check box, be sure to select it:


image


However, I would recommend that you edit your template another way.


1. Download the full template, by clicking the link "Download Full Template":

image


2. Choose to save the file and give it a meaningful filename:

image

Including the date in the filename it's a good idea for backup organization.


3. Keep this file unchanged and perform the edits in a copy of this file. This way, if something goes wrong you can go back by uploading the previous version of the template.

Use a text editor to perform your changes in the .xml file. You can use a basic editor such as Windows Notepad but consider to use an editor that colorize the code. Notepad++ is a good choice and it's free. Links:

- Notepad++ page: http://notepad-plus.sourceforge.net

- Download page; click at the "Download Now!" button:

image


4. Perform your edits in the template, save the file and upload the new template. The template will be immediately changed and in use.

image


If you want to preview the changes before applying them, copy the edited template text and replace the text of the text box with it. Then press "Preview":

image

If it is ok, press "Save Template".

This preview method doesn't always work, particularly if the changes involve JavaScript. The best approach is to create a test blog and performing the template tests there.

5. If your changes become problematic, just upload the original template that you saved at points 1/2.


That's it. Enjoy.

Facebook Like button XFBML tutorial

Posted by Mr.Editor Monday, May 10, 2010 26 comments

image

While searching for a solution that would let me add the "Like" button plus the ability to leave a comment on the "Liked" item (see picture on the left), I finally found the solution that I share bellow. Just follow exactly the next instructions and that's it.

Programming Language Popularity Index

Posted by Mr.Editor Wednesday, May 5, 2010 0 comments

Programming computer screenBellow are 3 ranks of popular programming languages. It's build with the "Language Popularity Index" tool, which is "a fully automatic, transparent, open-source and free tool to measure the popularity of programming languages on the Internet".

Surprise, surprise, the C programming language is again on the top (see the post "C programming language back at number 1 position!"). And Ada shows up on the 10th position for general-purpose and compiled languages! Wow.

State of the Internet Operating System

Posted by Mr.Editor Sunday, May 2, 2010 0 comments

Something interesting to be read:

State of the Internet Operating System - Part 1, Part 2. By Tim O'Reilly.

image This post contains some guidelines to improve the security level of your Blogger blog and some tips to recover control

Two reasons may have driven you to this page:

  1. you are in trouble and I hope you can find some help here;
  2. you came by chance and you had better check the following tips.

Believe me, security problems are real even if they haven't yet hit you. Here are some tips and guidelines you should follow.


How to Add Facebook's New "Like" Button to Blogger

Posted by Mr.Editor Thursday, April 22, 2010 7 comments

image
Facebook just lunched the "Like" button to be used in any page. To have it in your Blogger blog, do the following steps:

  1. First, do a backup of your blogger template (see it here: Template actions: download, backup, edit and restore) .
  2. Then edit your template and find the following text in the XML code:
    <data:post.body/>
    Tip: if you can't find it, try to search data:post.body until there is something similar and that ends with />

  3. Place the following code after that line:
    <iframe allowTransparency='true' expr:src='"http://www.facebook.com/plugins/like.php?href=" + data:post.url + "&amp;layout=standard&amp;show-faces=true&amp;width=530&amp;height=60&amp;action=like&amp;colorscheme=light"' frameborder='0' scrolling='no' style='border:none; overflow:hidden; width:530px; height:60px'/>


    Result:
    image

    Changing the Like' button to 'Recommend'
    If you prefer that your button says "Recommend" instead of "Like", it is just necessary to change the code of point 3: just change the action=like to say action=recommend. The following code does that:


    <iframe allowTransparency='true' expr:src='"http://www.facebook.com/plugins/like.php?href=" + data:post.url + "&amp;layout=standard&amp;show-faces=true&amp;width=530&amp;height=60&amp;action=recommend&amp;colorscheme=light"' frameborder='0' scrolling='no' style='border:none; overflow:hidden; width:530px; height:60px'/>


    Result:
    image

  4. Save the template and that's it.


There are other ways of doing this but the one recommended by Facebook (see here) won't work because it gives an Blogger gives an error when the template is being saved.  Also, the approach given  by Facebook won't allow individual "Likes" for each post (only for the whole blog).

Finally, If you prefer using the Facebook API ( to leave a comment on the "Liked" item), just have a look here.

Slate Wars: 15 Tablets That Could Rival Apple's iPad

Posted by Mr.Editor Wednesday, April 21, 2010 0 comments

image


The iPad has captured many hearts and minds, but a fleet of rival tablets led by a separatist Android army is about to attack, armed with HD Flash video, multitouch screens, front-facing cameras, multitasking...even Windows 7. Let's take a look.

image


Há uns tempos que esta mensagem de erro me chateava de cada vez que arrancava o computador. Finalmente dei-me ao trabalho de procurar uma solução:

How to change your drive letter assignments in Windows XP or Vista to fix the "Windows - no disk" etc error message, and how to uninstall your floppy drive

C programming language back at number 1 position!

After more than 4 years C is back at position number 1 in the TIOBE index. The scores for C have been pretty constant through the years, varying between the 15% and 20% market share for almost 10 years. So the main reason for C's number 1 position is not C's uprise, but the decline of its competitor Java. Java has a long-term downward trend. It is losing ground to other languages running on the JVM. An example of such a language is JavaFX script that is now approaching the top 20. (…)

image

O iPad como mesa digitalizadora

Posted by Mr.Editor Tuesday, April 6, 2010 0 comments

Por Carlos Martins:

image 
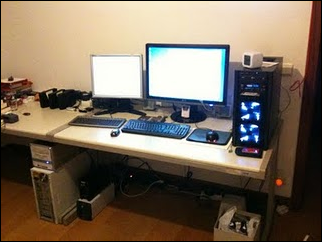
Podem até utilizar o iPad como monitor secundário multitouch, utilizando uma App (ainda um pouco "verde" mas que demonstra as possibilidades que um iPad poderá ter - e considerando o custo de uma mesa digitalizadora com ecrã, abre boas perspectivas para o tipo de uso que se lhe poderá dar.)

Um argumento que (quase) me convence pelo brinquedo. Para ficar mesmo contente, era esta funcionalidade não ter os actuais problemas e meter no iPad USB e um leitor de cartões.

Esta e mais um bom lote de dicas sobre o iPad.

Montagem de um computador, peça a peça

Posted by Mr.Editor Monday, March 22, 2010 1 comments

Cinco textos de Carlos Martins sobre a montagem de um computador, peça a peça. Muito bom.

[O meu PC - Making of]

Parte 1 - A montagem inicial
Parte 2 - A lista de componentes (e preços) e consumos eléctricos
Parte 3 - Alterações não-planeadas
Parte 4 - Montagem final
Parte 5 - O "Antes e Depois"

Followers